Yes..Malaysia Legoland has finally open. So, I was excited to pay it a visit because I been to the original Legoland in Billund, Denmark a few years back and I am eager to see how this one look like. When my sister asked whether I will be in KL on that particular date..I apa lagi, ON!
We left KL on Friday after lunch so we arrived in JB around 530PM. Luckily it was not that difficult to find the hotel where we stayed and nasib baik, the place also very nice. Siap ader breakfast and dekat dengan banyak tempat makan and a mall. So, I have nothing to complaint. We went to Legoland on Sunday as we decided to go to Singapore & spend the whole day there, just jalan2 and do some shopping.
It took around 45minute drive to Legoland from where we stay. Tengok jer the sign, my niece already very excited. We arrived just 10 minute before the opening time. We got our ticket (RM110 for children w/o water park & RM140 for adult, w/o water park). Very expensive if you ask me.
It was a Sunday so mmg assume akan banyak org. Tapi since we came very early, the crowd was not so bad.
Tempat ticket pun masih kosong.
I guess ni memang singature pintu gerbang Legoland because the one in Billund also look like this. As you enter the gate, you will pass the gift/Lego shop and then you will see the miniature city. Kat bawah ni...err..apa entah building ni, x ingat plak.
Then there this mosque in Terengganu (also I x ingat exact name)..sorry yer..kena la you all google.
And Putrajaya pun ader
Ni tasik kat Putrajaya tu..where normally people go for the boat cruise
Shop lots near Petaling Street
This one is the only KTM station (train station)
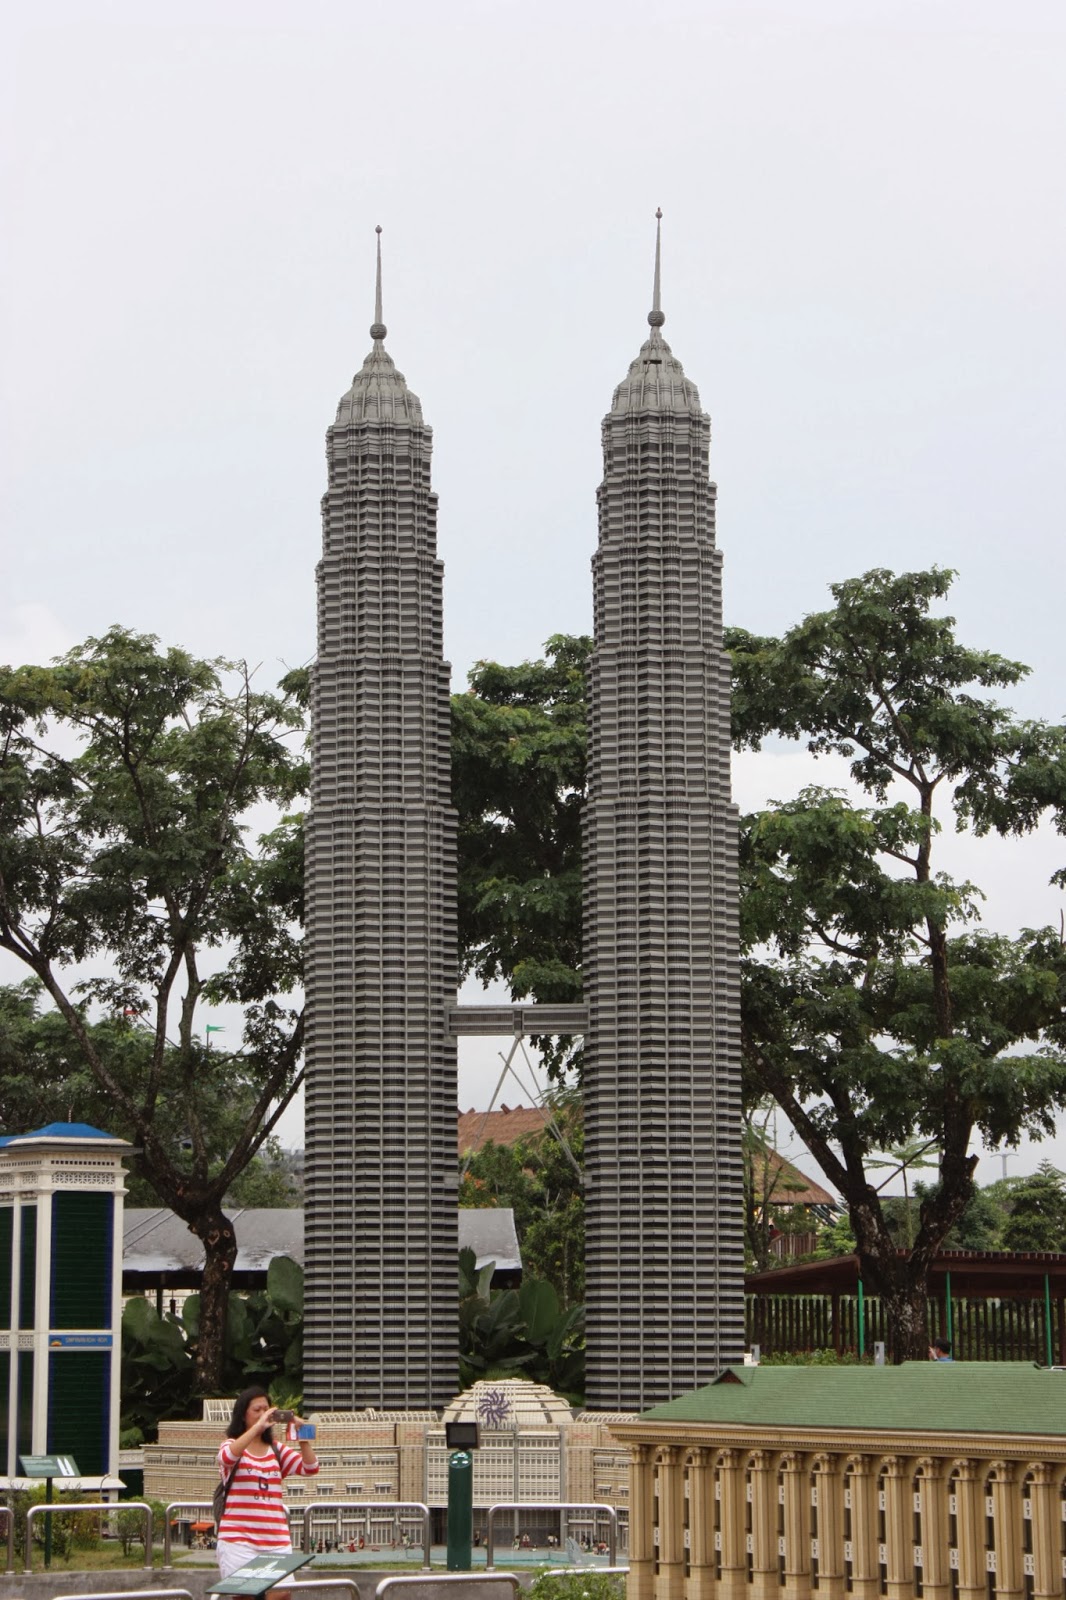
Of course, must have..The Twin Tower
This is Bangunan Sultan Abdul Samad (the court house yang lama)
KL Tower
This is KL SEntral and banyak lagi. The miniature city (Mini City) also ader some of the major attraction from various Asian countries like Thailand, Indonesia, Myanmmar, Singapore and Vietnam.
Since we were there very early, the crowd is just OK..so we decided to go for the rides before orang memenuhi the place. We go from one ride to another and we were so happy that the queue ...almost takder. Heheheh...so since some ride x boleh bawa camera, I can't displayed it here ya. Sorry..I guess you kena pergi sane to see it. Heehh...yang I x naik I can post here though...
First ride I think is this...again, I forgot what it is called but it is a dragon roller coaster. My nephew love it so much that he requested that we went for a second round. Well, since there are not much of people, why not...hehe
Then we're off to Imagination (different area have different name it seem)..Nothing much here (at least for me)..but we did naik the replica of the Taming Sari rotating ride (kat Melaka) just because we wanted some ac!! Hahah..walaupun awal pagi, it is still very humid! Can't imagine bila dah tengahari..I'll be roasted!
All smiling because of the ac..hehe
Lepas tu we did went for a few other ride and I think we went to this part of the park bila dah nak balik. This ride I knew I do not want to be a part off because I went to similar ride in Sunway Lagoon with a friend and we end up soaking wet! So, no more ....this time, I jadi photographer jer.
Tengok cam ok jer kan..
Masa naik slow giler..
Bila turun laju and then...BASAH!!! Hahaha...
Then we stop by a few ride for kiddy and I think lps tu we went here. Adventure of the Pharaoh..something cam tu la. Kira cam main laser tag. Syiok juga main ni..heheh
Ni bagi yang malas nak stay jauh you can stay here tapi mlm2 bosan giler la because this place it totally out of no where! Hahah..tempat makan pun xder.
So, that conclude our trip to Legoland. I know my blog don't tell so much about the whole theme park but I hope it will manage to give a glimpse of the place. Kalau nak tau detail, siler2 la google the website or best lagi, go there! But I must say, for a small part, this is a very expensive one. I mean, we were there literally for 1 hour and that show ...Legoland Malaysia is not so big.
Saturday, 21 December 2013
Christmas Sugar Cookie
Yes...I will update again yet another cookie. Hehe...since ada free time ni so better I update. Every year I will bake sugar cookie for Christmas (bila I kat sini la) because hubby like it very much. Ingat tak nak buat this year tapi dah dia request so I pun buat la. Tapi this year I berazam nak deco lebih cantik and detail.
As usual, you need butter, sugar & egg (but you only need the yolk). Mix it together in a bowl..
Then you add cream cheese. Yes...you heard me right. CREAM CHEESE! I came across one recipe that use it so I thought, why not. This is a different twist from the normal sugar cookie I ever made. Curious pulak nak tau cam maner rasa nyer so I add la cream cheese. Hehhehe..and don't forget the vanilla essence ya..
In another bowl, mix flour, baking soda, salt and ground nutmeg.
Mix both contents of the bowl together and mix until it form a dough yang x sticky. Then wrap the dough using a string wrap and masuk dlm fridge for few hrs or until dough is easy to work with.
Tadaa...ni jer hasil nyer. I memang x nak buat banyak because nak buat the cookie x susah. Bila part nak deco tu yang take soooo long time.
Since I am a baker, I always ada stock food coloring & any kind of multi-color decors in my pantry. Sangat berguna di saat memerlukan seperti masa ini. Hehhee..
As usual, you need butter, sugar & egg (but you only need the yolk). Mix it together in a bowl..
Then you add cream cheese. Yes...you heard me right. CREAM CHEESE! I came across one recipe that use it so I thought, why not. This is a different twist from the normal sugar cookie I ever made. Curious pulak nak tau cam maner rasa nyer so I add la cream cheese. Hehhehe..and don't forget the vanilla essence ya..
In another bowl, mix flour, baking soda, salt and ground nutmeg.
Mix both contents of the bowl together and mix until it form a dough yang x sticky. Then wrap the dough using a string wrap and masuk dlm fridge for few hrs or until dough is easy to work with.
Then rolled the dough to approx 1/8 inc thickness or if you are like me..rolled smp you rasa cukup tebal..hahaha..then cut using shape cutter. I always ader pelbagai cookie cutter & Xmas shape harus ada! Heehhe...Lepas tu bake for 8-10minutes in a 175C temp. Jangan over 10minutes pasal cookie anda nescaya hangus!! Hahha...coz sugar cookie ni very delicate. Cool of the cookie then you can start being CREATIVE!!
Since I am a baker, I always ada stock food coloring & any kind of multi-color decors in my pantry. Sangat berguna di saat memerlukan seperti masa ini. Hehhee..
Sayang nak makan as what my fellow friends mentioned tapi kena makan juga akhirnya. Heehhe..Nak cuba, ok..ni recipe nyer..
- 1 cup butter
- 1 pack of cream cheese (ard 200-250gm la tu kan)
- 1 cup of sugar
- 1 egg yolk
- 1/2 tsp of vanilla extract
- 21/2 cups of flour
- 1/2 tsp of salt
- 1/4 tsp of baking soda
- 1/8 tsp of ground nutmeg
As for the frosting, I use icing sugar, some food coloring & multi color sugar decors. This recipe suppose to yield around 48 pieces of cookie but if your cookie cutter is big like mine, maybe you get half of it.
Merry Christmas & Happy Baking..
Pinwheels cookie
It has been a while since I last updated my blog. I have been busy with things especially Christmas is just around the corner. Not that I will have any much of celebration this year because there will only be the two of us. And plus, the Danes do not have the 'open house' tradition like we Malaysian do. We only held 'close house'... only for the invited guests. But nevertheless, my in laws will be joining us for Christmas Eve dinner where we will host it at our home. And to lighten up my OWN Christmas mood, I baked some cookies. Originally I wanted to bake 6 types but decided on 3 the very last minute.
Here I would like to share my recipe on how to bake pinwheel cookie. It is called a pinwheel because as you can see from the picture, it look like a pinwheel. Although I am using red color, you can always use any kind of color that you feel like using. It is not so hard to make and it taste very buttery.
As usual, you need butter ( I prefer to use Lurpak. Yes, it is a bit pricey but from all the experience I used Lurpak, that true buttery taste is MARVELOUS!), flour, castor sugar (white because you won't want your cookie to look like it is hangus), baking powder, salt, vanilla essence, food coloring ( I'm using red) and multi -color nonpareil decors. If you want the color dough to have some flavor, you can use rose essence but mine no have ok. Heheh....
First, you make the dough. Blend butter & sugar together in one bowl then add vanilla essence. In another bowl, mix the flour, baking powder and salt. Yes, this cookie do not use any egg. Then mix the flour into the butter mixture. Mix well until it form a ball like dough. Separate the dough into two ball..
One you mix with the rose essence (if you intended to use add some flavor to your dough) and the red food coloring.
Another dough, just a plain one.
Then for each dough (separately), you 'sandwich' it with a wax paper or baking paper. You alas bawah dgn baking paper and cover atas juga la. Cam kat bawah ni..
Then you need to rolled it into a rectangular shape. Kalau nak very particular, you boleh la sukat the measurement (lebih kurang 11x81/2 inches) and ketebalan dlm 1/8 inch. Tapi kalau you macam I, I main agak2 jer. Bukan kata dah expert tapi memandangkan I bukan nak join competition, so if I tengok ketebalan ok..lebar ok..panjang ok..SET! Then you place both of the dough in the fridge, between 3 hrs to few days ( approx. 3days). Since I am not in a hurry, I left it overnight.
The next day, you take the rolled dough out from the fridge and kasi lembut sket. maybe biar for few minute. Then with the plain dough on the bottom, take off the wax paper on top of the dough and brush some egg white on top. Ini kira function as a glue to stick the two dough together. Lepas tu, take the red dough (tanggalkan wax paper kat bawah dough merah tu and place the red dough on top of the plain dough. Press it carefully so that it will stick together..
Like this...nampak kan the plain dough kat bawah. Sebelum you start rolling it cam nak buat swiss roll, you spread the multi-color decors in a tray. Then slowly roll the dough (tp make sure the dough x lembut sangat & tak keras sgt. If too soft, susah nak roll tp kalau too hard, it tends to break). As you begin to roll, gently curl the edge with your finger tips in order to avoid air pocket when you rolled the dough into a log. Lepas tu, place the 'log' dough in the tray that is full of the multi color decors. Keep rolling until the 'log' is completely cover by the decors. Lepas tu I believe the log dah lembut so masukkan dlm fridge dulu. Jangan potong when the 'log' lembut because it will be out of shape. Lepas few hrs, take out the log and cut it approx. 1/4inch thickness (oh ya, bila you dah roll jadi log tadi, trim the edge so nampak kemas sket).
As you can see, the shape tak round sangat kan. Xper..heheh...the look masih nampak ada pinwheel. Bake the cookie in a 175C temp. oven for 15-17 minutes.
The taste...very buttery and it is soft yet crunchy. Best untuk minum kopi or tea. Slamat mencuba uols!!
The recipe ( make between 24-36 cookies):
Here I would like to share my recipe on how to bake pinwheel cookie. It is called a pinwheel because as you can see from the picture, it look like a pinwheel. Although I am using red color, you can always use any kind of color that you feel like using. It is not so hard to make and it taste very buttery.
As usual, you need butter ( I prefer to use Lurpak. Yes, it is a bit pricey but from all the experience I used Lurpak, that true buttery taste is MARVELOUS!), flour, castor sugar (white because you won't want your cookie to look like it is hangus), baking powder, salt, vanilla essence, food coloring ( I'm using red) and multi -color nonpareil decors. If you want the color dough to have some flavor, you can use rose essence but mine no have ok. Heheh....
First, you make the dough. Blend butter & sugar together in one bowl then add vanilla essence. In another bowl, mix the flour, baking powder and salt. Yes, this cookie do not use any egg. Then mix the flour into the butter mixture. Mix well until it form a ball like dough. Separate the dough into two ball..
One you mix with the rose essence (if you intended to use add some flavor to your dough) and the red food coloring.
Another dough, just a plain one.
Then for each dough (separately), you 'sandwich' it with a wax paper or baking paper. You alas bawah dgn baking paper and cover atas juga la. Cam kat bawah ni..
Then you need to rolled it into a rectangular shape. Kalau nak very particular, you boleh la sukat the measurement (lebih kurang 11x81/2 inches) and ketebalan dlm 1/8 inch. Tapi kalau you macam I, I main agak2 jer. Bukan kata dah expert tapi memandangkan I bukan nak join competition, so if I tengok ketebalan ok..lebar ok..panjang ok..SET! Then you place both of the dough in the fridge, between 3 hrs to few days ( approx. 3days). Since I am not in a hurry, I left it overnight.
The next day, you take the rolled dough out from the fridge and kasi lembut sket. maybe biar for few minute. Then with the plain dough on the bottom, take off the wax paper on top of the dough and brush some egg white on top. Ini kira function as a glue to stick the two dough together. Lepas tu, take the red dough (tanggalkan wax paper kat bawah dough merah tu and place the red dough on top of the plain dough. Press it carefully so that it will stick together..
Like this...nampak kan the plain dough kat bawah. Sebelum you start rolling it cam nak buat swiss roll, you spread the multi-color decors in a tray. Then slowly roll the dough (tp make sure the dough x lembut sangat & tak keras sgt. If too soft, susah nak roll tp kalau too hard, it tends to break). As you begin to roll, gently curl the edge with your finger tips in order to avoid air pocket when you rolled the dough into a log. Lepas tu, place the 'log' dough in the tray that is full of the multi color decors. Keep rolling until the 'log' is completely cover by the decors. Lepas tu I believe the log dah lembut so masukkan dlm fridge dulu. Jangan potong when the 'log' lembut because it will be out of shape. Lepas few hrs, take out the log and cut it approx. 1/4inch thickness (oh ya, bila you dah roll jadi log tadi, trim the edge so nampak kemas sket).
As you can see, the shape tak round sangat kan. Xper..heheh...the look masih nampak ada pinwheel. Bake the cookie in a 175C temp. oven for 15-17 minutes.
The taste...very buttery and it is soft yet crunchy. Best untuk minum kopi or tea. Slamat mencuba uols!!
The recipe ( make between 24-36 cookies):
- 2 cups flour
- 1/2 tsp baking powder
- 1/4 tsp salt
- 1 cup of castor sugar
- 21/2 sticks butter (1stick of butter is approx. 122gm)
- 1 tsp vanilla essence
- 1/2 tsp strawberry/rose flavor (if you decide to add flavor to the red dough)
- 1/2 tsp red food coloring
- 11/2 cups of multi color decors (more if you want)
So, smua dah diterangkan. Siler la mencuba. Maybe your shape is better than mine...coz mine a bit out..x cukup round. Hehhe..
Monday, 16 December 2013
Pork Chop For Dinner
I have been abandoning my blog for quite a while now. Been busy constructing an essay for a job application. All I have to do is write a one page essay on what motivate me to join the program and wow..that took me a week to construct and reconstruct. Even now I haven't come out with a concrete essay. Luckily I have until February to submit.
Anyway, I had a request yesterday to cook pork chop for dinner so I thought of sharing my very own recipe of pork chop. Now, this is not a healthy recipe yeah..that I have to let you know. That is also the reason why I only cook this few times a year. But I can assure you that it taste good! Unhealthy food always taste good don't it? Hehhe..ok for those who can't eat pork, you can simply replace it with other kind of meat.
So, for this you need..obviously pork meat, butter, milk/cream, flour, paprika, salt & some vegetables (button mushroom, carrot & capsicum).
First, mix some flour with salt and paprika (this is an option yeah. You can replace it with other herb/spices. I like to use either chillies flake or paprika). Mix in a plate.
And coated the meat one by one with the flour mixture.
So, roughly all your meat will be coated with the flour mixture and it look like this..
You see the orange/brownish color, that why I like to use paprika. Then you need to melt a few tbsp butter on a hot pan.
I told you that this is not a healthy dish. Heheh...the buttery taste is very yummyy! Then pan fry the coated meat in the melted butter.
Not sampai masak ya, just bagi dia brownish color..make sure you pan fry both side..
Lepas tu, place all the meat dalam bekas untuk masukkan dalam oven.
When you do the pan frying, you can prepare the vegetables and here I used button mushroom, capsicum and carrot. You can also add potatoes or tomatoes. Really...any vegetable will do but please jangan la letak bayam ke..kangkung ke..tu melampau la kan..
Slice the button mushroom. Please don't use the canned button mushroom. It has to be the 'real' one.
Then continue slicing the capsicum & carrot. Bila smua dah ready, again, take few tbsp butter & melted it on a hot pan. Recycle jer pan tadi..hehehe
Bila butter dah melted, add the sliced button mushroom. Don't be alarm. It may look like too many but once the water is squeeze out from it, you be surprised how little mushroom you have.
You will end up with a lot of water in the pan so take out some of the water and then add the rest of the sliced vegetable.
Then when all is mixed, add some milk or cream. Not too much. Just to give it a little watery. See..sikit jer air dia..
Then add flour..
Continue on stirring until the gravy is thicken. If tak cukup pekat, add sikit flour. Bila dah pekat, pour all the vegetable on top of the meat tadi..
The water from the vegetable will make sure the meat won't get very dry when it is cooking inside the oven. The dish will have a little bit of gravy too. It is not suppose to be dry. Kalau nak avoid sayur & meat very dry cepat, cover dish dgn aluminum sheet. Cook for 30-45 min in a 190C.
Tada..dah masak. Ni baru kluar oven. X nampak the meat pasal kat bawah tu. You can serve the meat with pasta..boil potato or simply nasi (typical Asian nyer style la kan). Hehehe..
Try la if ada masa. Pasti sedap. Tapi jangan masak slalu tau. If you gain weight jangan salahkan saya ok. Hehehhe...
Anyway, I had a request yesterday to cook pork chop for dinner so I thought of sharing my very own recipe of pork chop. Now, this is not a healthy recipe yeah..that I have to let you know. That is also the reason why I only cook this few times a year. But I can assure you that it taste good! Unhealthy food always taste good don't it? Hehhe..ok for those who can't eat pork, you can simply replace it with other kind of meat.
So, for this you need..obviously pork meat, butter, milk/cream, flour, paprika, salt & some vegetables (button mushroom, carrot & capsicum).
First, mix some flour with salt and paprika (this is an option yeah. You can replace it with other herb/spices. I like to use either chillies flake or paprika). Mix in a plate.
And coated the meat one by one with the flour mixture.
So, roughly all your meat will be coated with the flour mixture and it look like this..
You see the orange/brownish color, that why I like to use paprika. Then you need to melt a few tbsp butter on a hot pan.
I told you that this is not a healthy dish. Heheh...the buttery taste is very yummyy! Then pan fry the coated meat in the melted butter.
Not sampai masak ya, just bagi dia brownish color..make sure you pan fry both side..
Lepas tu, place all the meat dalam bekas untuk masukkan dalam oven.
When you do the pan frying, you can prepare the vegetables and here I used button mushroom, capsicum and carrot. You can also add potatoes or tomatoes. Really...any vegetable will do but please jangan la letak bayam ke..kangkung ke..tu melampau la kan..
Slice the button mushroom. Please don't use the canned button mushroom. It has to be the 'real' one.
Then continue slicing the capsicum & carrot. Bila smua dah ready, again, take few tbsp butter & melted it on a hot pan. Recycle jer pan tadi..hehehe
Bila butter dah melted, add the sliced button mushroom. Don't be alarm. It may look like too many but once the water is squeeze out from it, you be surprised how little mushroom you have.
You will end up with a lot of water in the pan so take out some of the water and then add the rest of the sliced vegetable.
Then when all is mixed, add some milk or cream. Not too much. Just to give it a little watery. See..sikit jer air dia..
Then add flour..
Continue on stirring until the gravy is thicken. If tak cukup pekat, add sikit flour. Bila dah pekat, pour all the vegetable on top of the meat tadi..
The water from the vegetable will make sure the meat won't get very dry when it is cooking inside the oven. The dish will have a little bit of gravy too. It is not suppose to be dry. Kalau nak avoid sayur & meat very dry cepat, cover dish dgn aluminum sheet. Cook for 30-45 min in a 190C.
Tada..dah masak. Ni baru kluar oven. X nampak the meat pasal kat bawah tu. You can serve the meat with pasta..boil potato or simply nasi (typical Asian nyer style la kan). Hehehe..
Try la if ada masa. Pasti sedap. Tapi jangan masak slalu tau. If you gain weight jangan salahkan saya ok. Hehehhe...
Subscribe to:
Posts (Atom)